Tutorial: How to Add Anchor Links in Emails

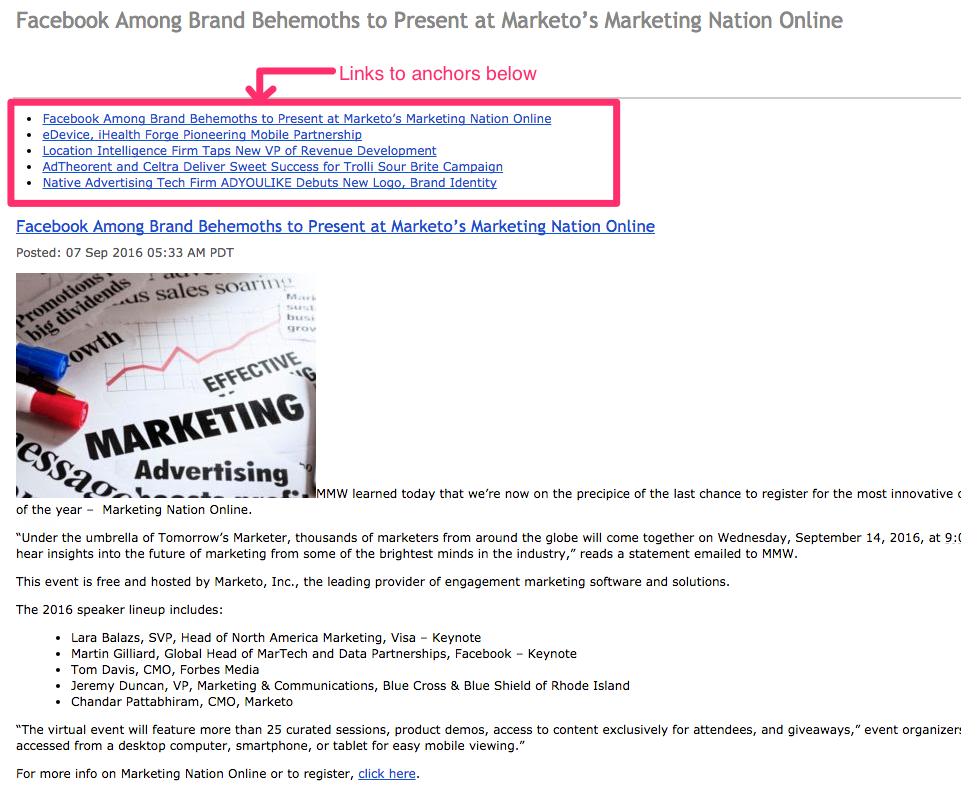
Anchor links in email are incredibly useful for newsletters that are long and content-rich. They give your subscribers a chance to quickly scroll down and directly skip to where they want to read. Here’s a quick example from Mobile Marketing Watch, which uses anchor links at the top of their daily newsletter so readers can quickly navigate to each section.
Today’s workshop
Good news! Adding an anchor link in your email campaign is easier than you think. All you need is a basic know-how of the HTML link structure of your anchor links. As we’ll see, an anchor link is made up of two parts: the URL link and the actual anchor tag that the link is “jumping” to in your email.
Let’s look at a specific newsletter example and show you how to replicate its anchor links by using the BEE editor, so you can follow along. Here’s a quick video recap:
From developing integrations to strategic support, from creating creative concepts to optimizing results.
Our inspiration: A nice example of anchor links in email
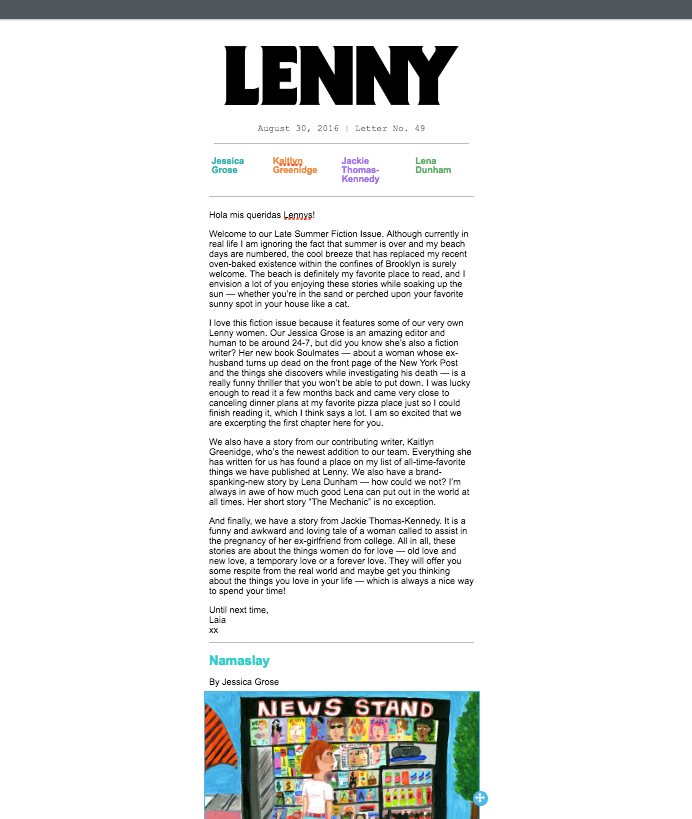
We regularly see anchor links put to good use in Lenny Letter, a newsletter created by actor/director Lena Dunham and her best friend/director Jenni Konner. Lenny focuses primarily on long-form content, thought-provoking essays and stories, and provides that content within the email itself. The header includes colorful anchor links to each corresponding story within the email. Here’s how the links look across the top (starting with Jessica Grose and ending with Lena Dunham):
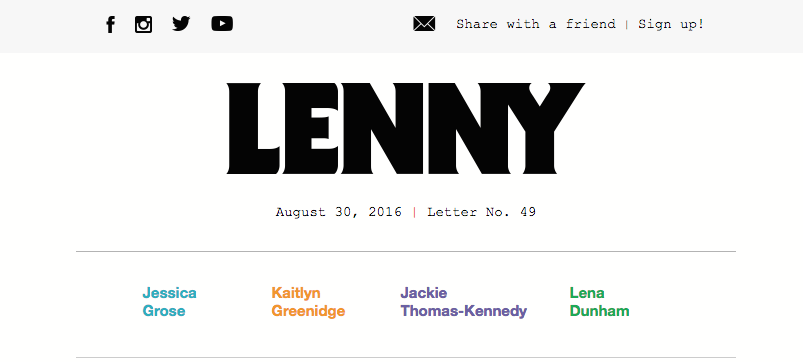
Each color corresponds with the author’s story, so if a reader wants to read Kaitlyn Greenidge‘s story first, for example, tapping her name (the orange anchor link) takes the reader directly to her story section (where the title, “I Love Betty,” is also in orange).
Getting started
Now that you’re familiar with the concept of anchor links in emails, let’s you walk through how to add them in the BEE editor. Follow along and open the BEE editor inside your MailUp platform – or sign up for a free trial in case you haven’t one yet.
Step 1: Build the email
To start, we’ll recreate the Lenny email in BEE. The header is simple: using a basic one-column design, drag in the Lenny image and add the text (in Courier) beneath it. Next, drag in a four-column structure to arrange the top anchors.
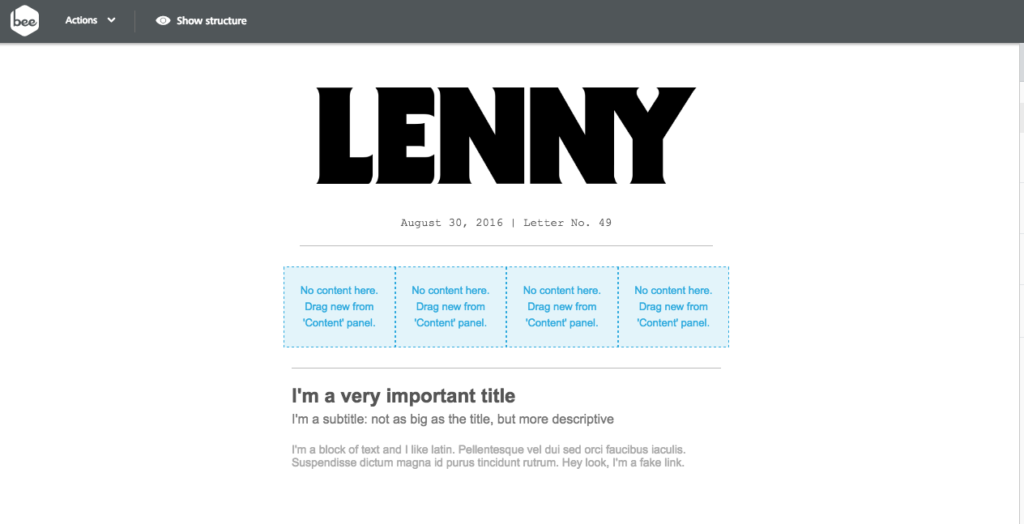
Continue to add text and images to recreate the header, intro, and first story.
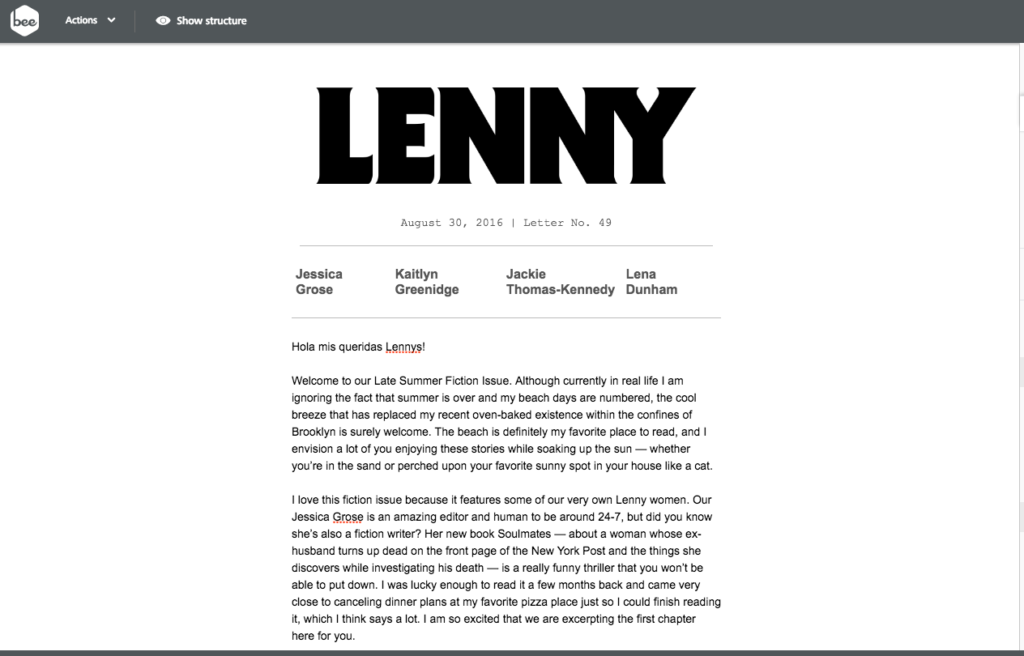
After formatting the color of the text, get ready to add the links.
Step 2: Choose an anchor link name and its position
Now it’s time to name and position the first anchor in the correct section of the email. For this step, we’ll be using the custom HTML content block in BEE from the Content menu to add our anchor (i.e. think of it as your bookmark).
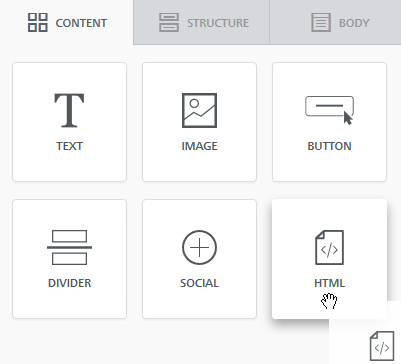
Drag and drop the HTML block to where you want the link to “jump” down to; in this case, it’s right above Grose’s story, titled “Namaslay.”
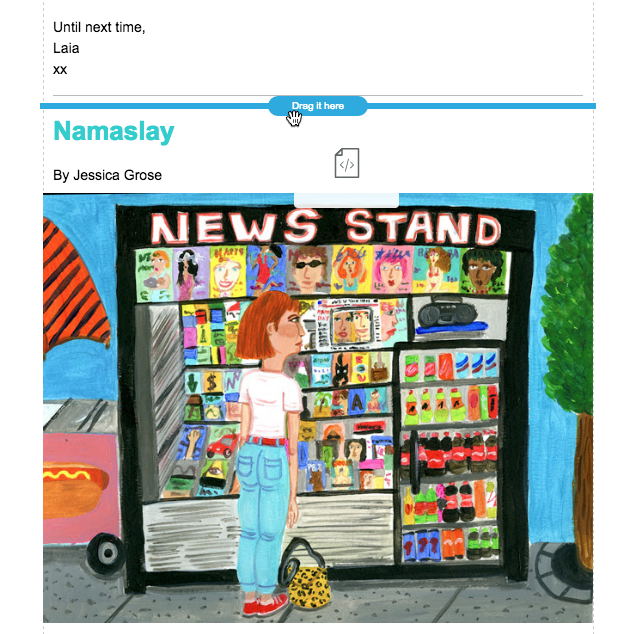
This is how the HTML block looks once it’s in position but before we add code:
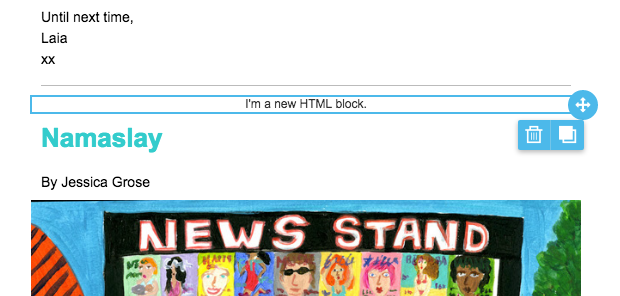
To create the anchor, paste in one line of HTML code in the Content Properties field of the custom HTML block on the right: <a name=”grose”></a><br />

The name in quotes (“grose”) can be whatever you want, but keep it simple and easy to remember (ideally one word) as this is the keyword that you will use when linking to this anchor tag.
Step 3: Link the anchor
Now that the anchor’s position has been specified, the text in the header needs to be linked to it. Simply select “Jessica Grose” and choose the Insert Link selection in the toolbar.

In the menu, link to the anchor by entering #grose in the URL field.
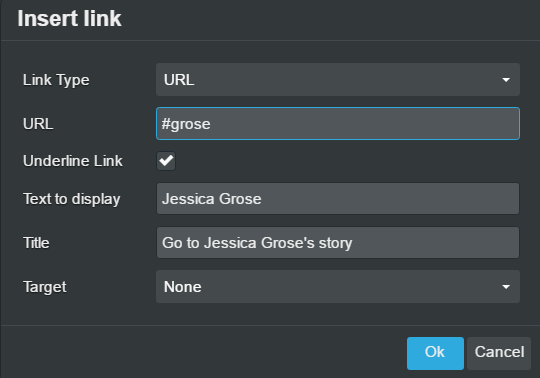
For the link to work, it’s important to include the hashtag (#) before the name, and make sure the name matches the one you chose earlier. And, of course, the shorter and simpler the name, the easier it’ll be to remember!
Now, you have created the two parts of your anchor links: the anchor text and the link pointing to it.
Clone icon: duplicate that HTML content block, then copy it and drag it to the next section. Then, simply update the name contained within the quotes, and link the text at the top to the new anchors you have created.

Step 4: Send a test email to test the anchor links
Once you receive the email, click on the anchor links and watch the magic happen, as demonstrated in this short animation:
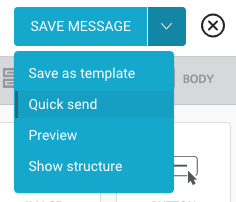

Voilà! And that’s it. It works!
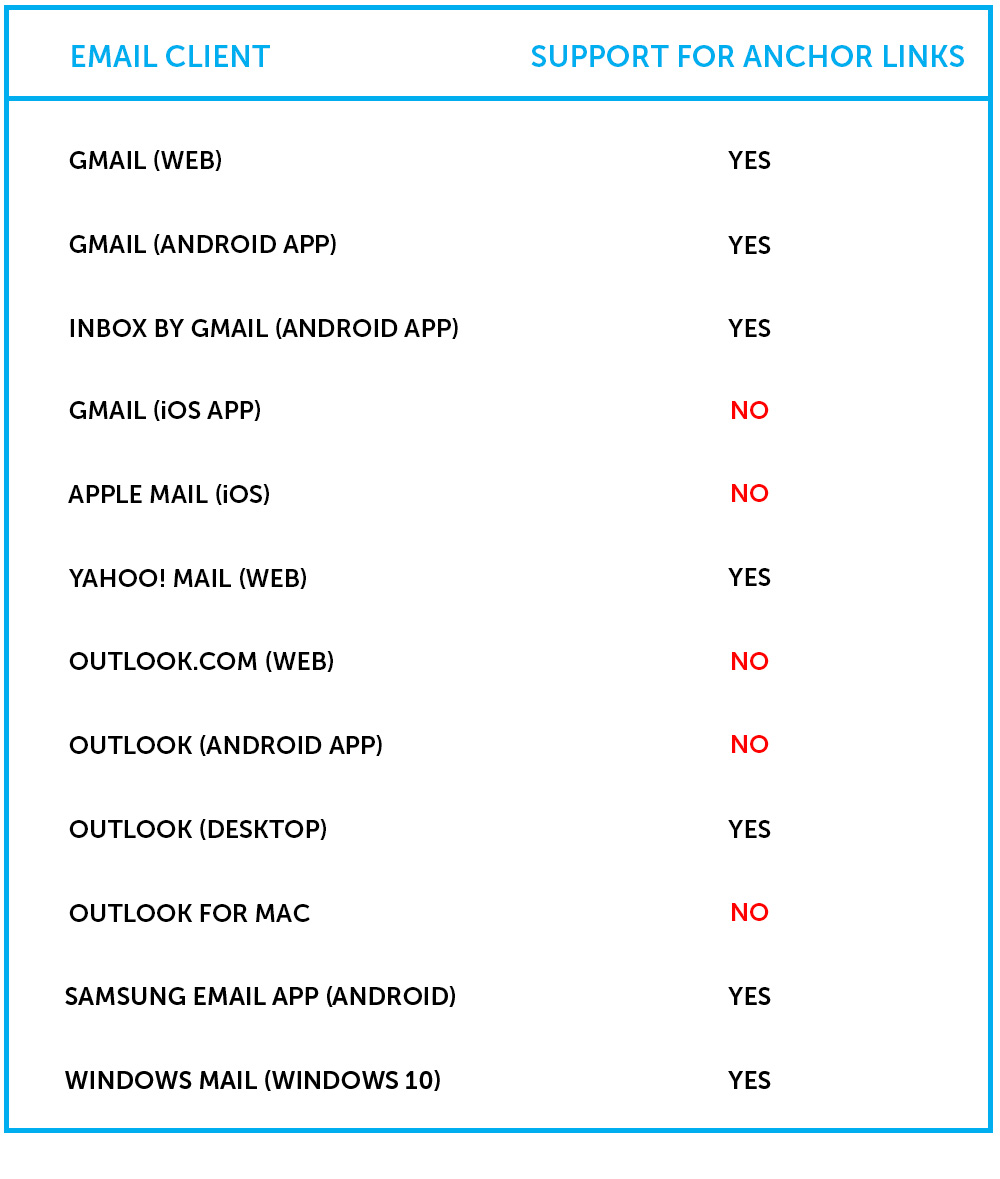
Email client support for anchor links
Anchor links are not supported by all email clients, so keep this in mind when making a decision of whether or not to add a table of contents to your newsletters. We’re going to publish some additional research on this in the near future. For now, here is a quick report with some of the most popular email clients (see a report of email clients by marketshare):
Anchor links email: wrap up
Did you try adding anchor links in your emails? Email client support issues set aside, adding anchor links to your email can be a pretty effective and simple design tactic to help your subscribers scroll and read your content! If you’re not already using BEE, sign-up for a MailUp free trial and have access to additional templates and design features.
